
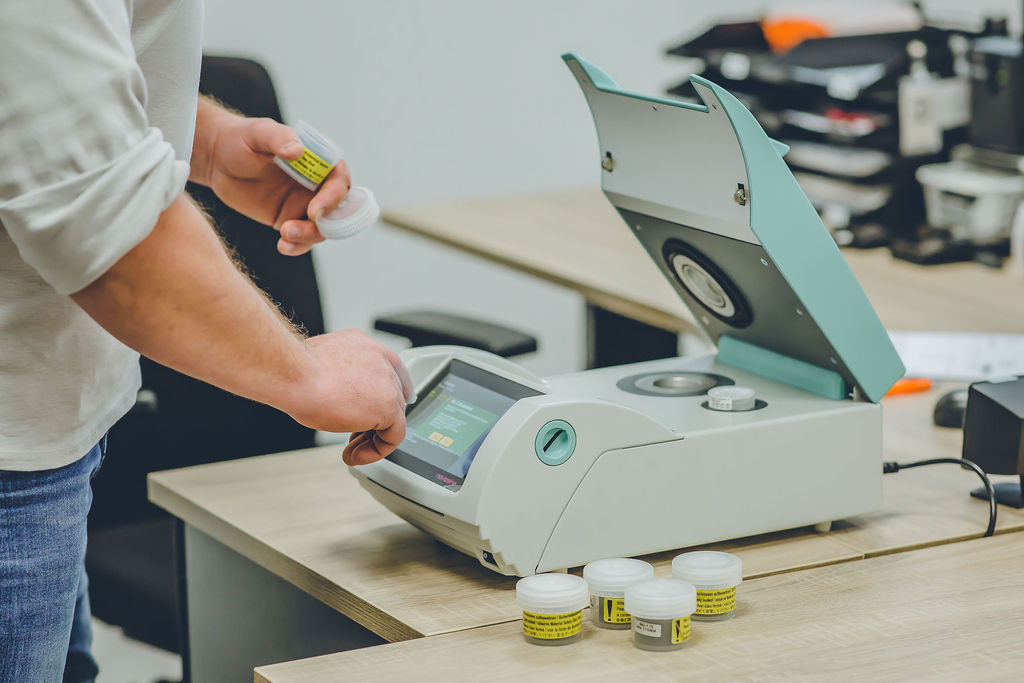
We are specialists in measurement technology and we are here to help you with data acquisition, displays, hand-held meters, infrared temperature meters or climate sensors.
We can also provide you with advice and tips when it comes to measuring Aw values.
If you are not yet fully familiar with what Aw values are and what measuring this parameter can mean for your business process, then read our Blog ‘What is the Aw value or water activity?’
- General tips for measuring the Aw value
- Preparing product samples
- Cleaning the Aw meter
- Calibrating the Aw meter
- Problems with calibration
- Using filters
1. General tips for measuring the Aw value
- Leave the Aw meter switched on day and night;
Our Aw meters are designed to be left on 24 hours a day so you can take a reading any time. - Empty the measuring chamber after use;
After each measurement, empty, clean and dry the measuring chamber to extend the lifespan of the measuring cell. - Always perform measurements on samples at room temperature;
Make sure your sample is in a sealed sample cup at room temperature as this will speed up the measuring time. - Make sure the measurement is representative;
The Aw value may no longer change after stabilising, otherwise your measurement will be less accurate. - Select the appropriate measurement mode;
Five minutes in AVERAGE mode is a safe stability parameter. Should you wish to alter this, go to: CHAMBER SETTINGS > STABILITY MODE. - Watch out for false stability!
In FAST mode, the Aw value needs to be stable for at least two minutes before the meter will give a signal that it is ready. If you have a sample that is less hygroscopic or contains a large amount of fat or oil, the Aw value will continue to rise. In such cases, it is better to select a longer measuring time. - Select the appropriate time for your measurement
The accuracy of your measurement is determined by how long it lasts. If the device is in FAST mode, the same sample may produce a different reading than if it is in a SLOW one. It is up to you to decide what level of accuracy is required for your measurement.
It is taking too long to measure my sample
Your measurement may occasionally take a very long time. There are various possible reasons for this. We have listed the most common ones below.
- The sample is not at room temperature; condensation may have formed that affects your sample.
- The sample contains a lot of oil and is not hygroscopic; this kind of sample needs longer to stabilise. It is therefore normal for it to take longer.
- Are you using a filter? If so, it might be saturated. Remove the filter from the meter and start the measurement. If your measurement now takes less time, then the filter needs replacing.
- Are you measuring samples with different Aw values in succession? If you are measuring a low Aw value product immediately after a high Aw value product, be sure to leave the meter open for a while to prevent condensation from forming on your sample.
2. Product preparation
Before starting your measurement, there are a few things you need to bear in mind. Good preparation is half the battle, so take the following points into consideration to ensure your measurements run smoothly.
- Cut your sample into small pieces to create more surface area. This will make it easier for the product to release the free water for the measurement.
- Blend composite products briefly (max. 15 seconds to prevent heat generation), so the sample takes on a homogeneous structure allowing a representative measurement to be taken.
- Do not use a mortar! This will extract moisture from your sample.
- Fill the sample cup right up to the line (about three-quarters full). Overfilling the sample cup can cause damage to the sensor, and if any residual product sticks to the filter or the measuring cell, it will affect the accuracy of the readings.
- If you have a lot of measurements and wish to prepare them in advance, place the lid on the sample cups so that the samples do not dry out or attract moisture. Do not keep prepared samples for more than one day!
- Allow all samples to get up to room temperature in a sealed sample cup before starting your measurement.
3. Cleaning the Aw meter
Aw meter
- Always use a damp cloth to clean your Aw meter. Never use alcohol or cleaning agents. Using water will extend the lifespan of your meter.
Measuring chamber
- Empty the measuring chamber after each measurement and remove any sample residue.
- Only clean the measuring chamber with a damp cloth. Do not use any alcohol or cleaning agents, as these may damage the measuring cell.
- Check the sealing rings on the measuring chamber; they must create a proper seal so the measuring chamber maintains the correct temperature during measurements.
Sample cup
- Used sample cups can simply be reused. Clean with water after use and dry thoroughly. Do not clean them with alcohol!
If your sample cup is discoloured, dispose of it and use a new one. This will help prevent any measuring errors.
4. Calibrating the Aw meter
Proper maintenance of the meter involves regular calibration. We recommend carrying out a monthly calibration of at least two points within your measurement range so you can be certain that the readings are accurate.
Visual inspection
- Calibration standard; this is a blend of elements and liquid. The lower the value of the calibration standard, the drier it is. So calibration standard 6 contains little water.
- The calibration standard must not show any signs of leaking and must be dry on the outside.
- If the calibration standard is lumpy, simply shake the calibration standard carefully from side to side until the salt has dissolved again.
- Store the calibration standards in their original airtight containers. Close the lids firmly and place them horizontally in the case supplied. This will help them last longer.
How to calibrate
- Set the stability parameters to the correct value, i.e. to SLOW mode (the LabMaster Neo does this automatically when you scan the calibration standard), or allow them to stabilise for at least 45 minutes.
- Set the meter to 25 °C. (Apart from on the Labswift as this does not heat or cool and is therefore not temperature adjustable)
- Make sure there are no lumps in the calibration standard. If this is the case, shake it gently from side to side until the salt has slightly dissolved
- Go to the calibration menu and follow all the steps. The meter will then adjust the sensor. The software then adjusts the sensor to the correct value.
Caution! When calibrating, the measuring instrument will give the most likely calibration value. In some cases, this may be a different value than the calibration standard that you have used to calibrate it. Therefore select the appropriate point that refers to your calibration standard.
Recommendation: Once a month
- At least once a month, calibrate a minimum of two points close to the values you measure. If your measurement range extends beyond the two points, then take the calibration point that falls within your measurement range.
- On the meter, you can set a reminder for the monthly calibration.
- Go to: CHAMBER SETTINGS > SENSOR CALIBRATION. ..> WARNING EXPIRED CALIBRATION, and enter the number of days between each reminder.
- If you find there to be an error of more than 0.006 after calibration, then you will need to go through the whole calibration process again and adjust the meter.
- If the error is greater than 0.01 and this has already occurred several times, then book an appointment and we will help you resolve the issue.
Recommendation: Once a year
- We recommend that you have your Aw meter calibrated and serviced by our calibration department at least once a year. And of course, it will be certified! We not only inspect the meter and the measuring cell, we also measure your calibration standards against our reference standards.
- So when you send us the meter to be serviced, remember to send the calibration standards along with it.
Did you know that Aw meters are not the only devices that we calibrate and service? You can also come to us for temperature meters, moisture analysers, pH meters, various handheld meters, residual oxygen/CO2 meters.
Read more about purchasing, using and maintaining pH meters here >>
Contact us for more information!
5. Problems with calibration
You may encounter a problem during calibration. We have listed the most common problems and solutions below:
- Aw value keeps changing;
To achieve a correct measurement, the calibration salt must stabilise for long enough. Leave the salt in the meter for at least 45 minutes.
- The calibration curve is different;
If you select the wrong value, the calibration curve will be different. (The LabMaster NEO automatically selects the correct value when you scan the calibration salt.)
- RANGE ERROR / SENSOR NEARLY EXHAUSTED;
If this message appears, the measuring cell may be defective. You can check this with a calibration standard. Place the calibration standard in the meter and start the measurement. If the meter indicates a value that does not come close to the calibration standard, please contact Pedak so we can look into the issue together more closely. - The difference in temperature between the meter and the salt is too big;
Make sure the calibration standards are stored at no less than room temperature. Preferably at 25 C.
6. Using filters
In some cases, it may be wise to use a filter in your Aw meter.
This will prevent the measuring cell from being affected by, for example:
- Acids
- Alcohol
- Volatile vapours
- Powerful aromas
Caution! If the alcohol content of your samples is greater than 0.5%, then we have a special measuring cell. Our specialist will be happy to tell you more about it.
Replacing the filter
We recommend changing the filter regularly. The life of the filter varies according to the user and the samples being measured. How can you tell when the filter needs replacing? Our tips:
- Carry out a visual inspection;
Are there signs of discoloration or corrosion?
- The calibration value is way off;
This could indicate that the filter is saturated.
- Longer measuring time;
If measurements take longer than usual, it may be a sign that the filter is saturated. You can test this by measuring without a filter; if the process is much quicker, then it is time to replace the filter.
If you can not find an answer to your question on this page. Please contact us: info@pedak.nl or +31 (0)475 497424